 Uma
Uma Quick Answer
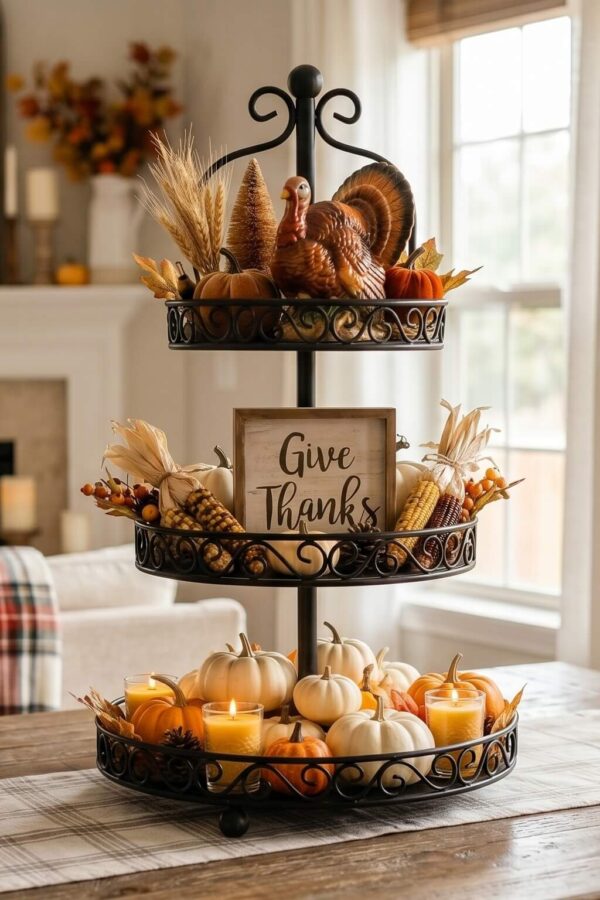
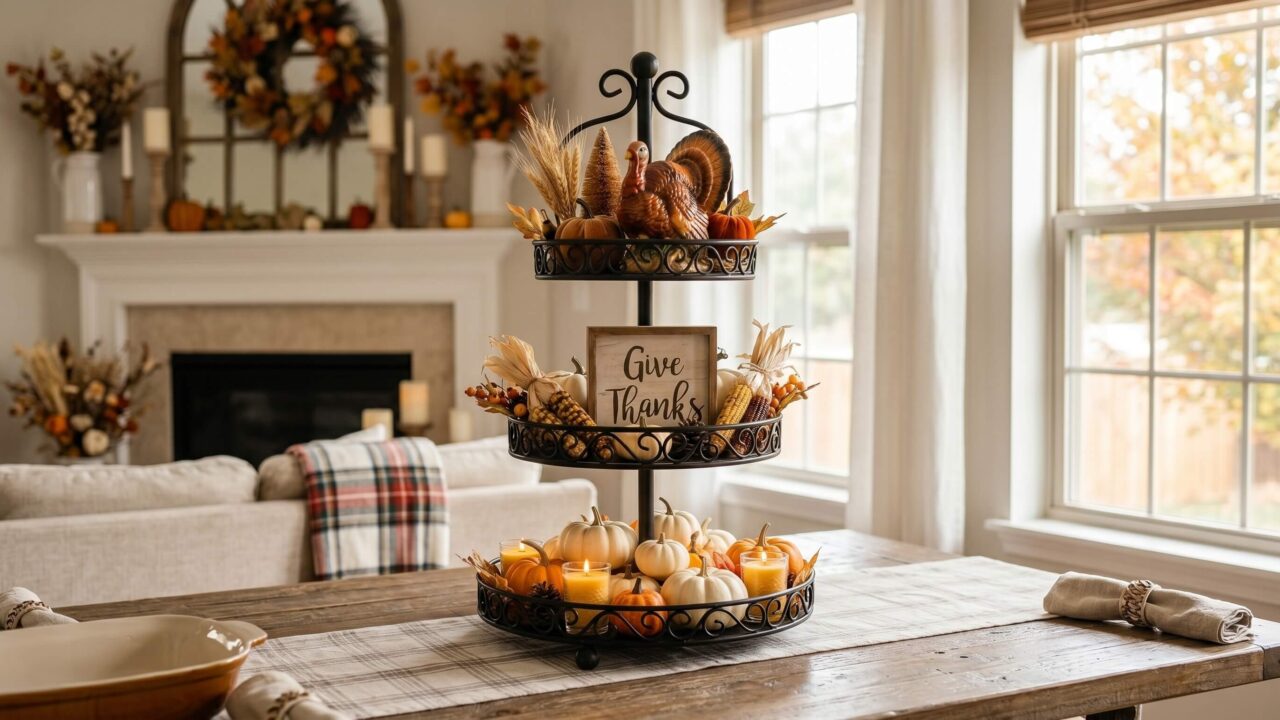
The best fall tiered tray decor ideas use the three tier structure to build a complete seasonal vignette with height variation across the tiers: small pumpkins and candles on the bottom tier for grounding, medium elements such as lanterns and botanical arrangements on the middle tier, and a vertical accent such as a small sign or tall candle on the top tier. These 20 ideas cover every fall style and every skill level, from beginner five minute arrangements to fully styled seasonal displays.
Tiered trays are one of the most versatile and most pinned decorating formats on Pinterest because they provide built in height variation, a contained display footprint, and a structure that makes good styling instinctive rather than difficult. A tiered tray with the right seasonal elements on each level looks designed even when it is assembled quickly with simple materials.
These 20 fall tiered tray decor ideas are organized from the foundational setup and element choices through to specific complete arrangements for every fall style, including transitions from fall to Halloween and from Halloween to Thanksgiving.
Tray Selection and Setup
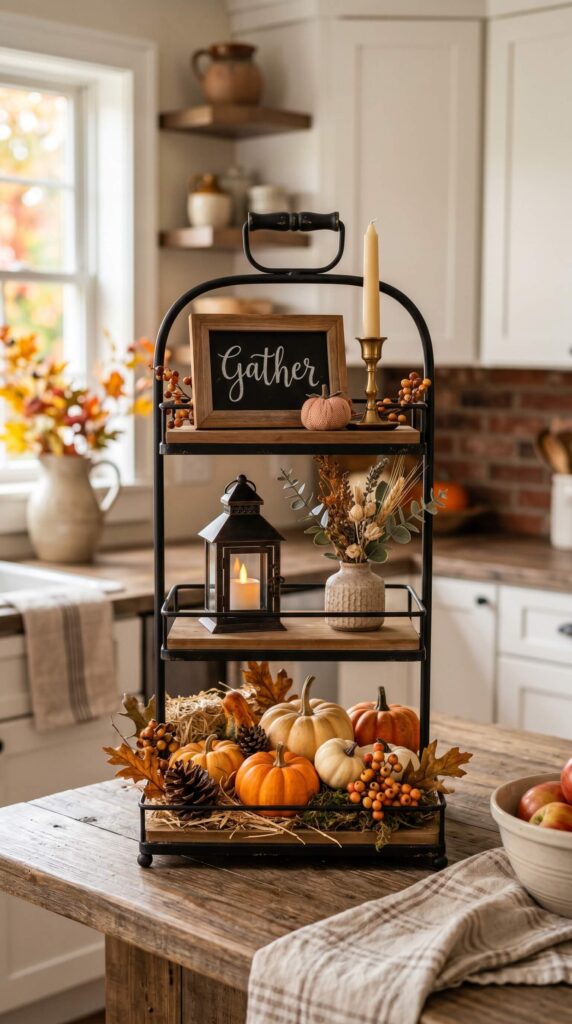
1. Choose a Tray Style That Matches Your Home Aesthetic
The tray itself is a significant styling element, not just a neutral holder for the objects on it. A matte black metal farmhouse tray with a distressed finish suits a rustic or farmhouse aesthetic. A white painted wooden tray suits a cottage or Scandinavian style. A natural wood tray with warm tones works in virtually every style. A gold or brass metal tray suits a more formal or glam interior. Choose the tray that feels consistent with the room it sits in and the rest of the fall decorating in the space.
Three tier trays provide more height variation and more display space but require a larger surface and more elements to fill them well. Two tier trays are more manageable in smaller spaces and with fewer elements. If you are new to tray styling, a two tier tray is easier to work with and still provides the height variation that makes tiered tray displays visually interesting.
2. Place the Tray on a Surface Where the Sides Are Visible
A tiered tray placed flat against a wall loses half its display because the back of each tier is not visible. Position the tray so it can be seen from three sides: the front and both sides. On a kitchen island, a dining table center, a console in the entryway, or a coffee table with clear space around it, the tiered tray reads as a full three dimensional arrangement rather than a flat display against a wall. If you must place it against a wall, use the back of each tier to lean elements at angles that are visible from the front.
3. Use Risers Within the Tiers to Add Height Within Each Level
Even within each tier of the tray, adding height variation makes the display more dynamic. Small wooden blocks, a stack of two or three books, an upturned terracotta pot, or a small wooden crate inside a tier creates a raised platform for one element within that level. The result is a display with height variation not just between the tiers but within each tier, which makes even a simply styled tray look like it was arranged with intention and skill.
4. Start Styling from the Bottom Tier Upward
Always start placing elements on the bottom tier first, then the middle, then the top. The bottom tier is the largest and most visible and it sets the proportion and scale for everything above it. If the bottom tier is overfilled, the whole display looks crowded. If it is underfilled, the upper tiers have nothing to support them visually. The correct fill level for the bottom tier is roughly 70 percent of its available surface, leaving some breathing room between elements.
Fall Color Palette Approaches
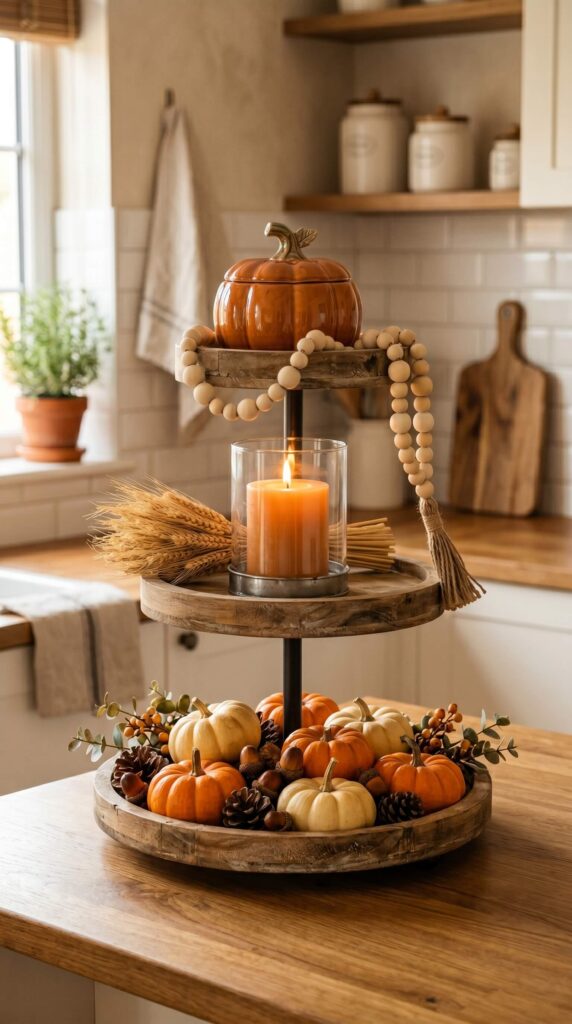
5. Classic Orange, Cream, and Wood for a Traditional Fall Tray
The classic fall tiered tray palette is orange, cream, and warm natural wood in as many material variations as possible. Deep orange mini pumpkins on the bottom tier, cream colored beeswax or soy candles in the middle tier, and a small wooden or ceramic element at the top create the foundational arrangement. Add pine cones, acorns, and wooden beads as filler elements between the main pieces. The entire arrangement reads as harvest classic and works in any style of kitchen or living room.
6. Burgundy, Copper, and Black for a Richer Fall Palette
A fall tiered tray in deep burgundy, copper, and matte black reads as more sophisticated and dramatic than the standard orange approach. Use dark burgundy velvet mini pumpkins, copper wire pumpkin decorations or copper leaf garland, and matte black metal elements such as small lanterns or letter cutouts. Candles in deep red or burgundy add to the rich tonal depth. This palette suits a more contemporary or formal interior and photographs particularly well against a white or light kitchen background.
7. White, Sage, and Rust for a Modern Fall Tray
White and cream pumpkins alongside muted sage green elements such as dried eucalyptus sprigs, sage green ceramic pumpkins, or sage velvet pumpkins, with small rust orange accents in the form of one or two standard orange mini pumpkins or dried orange flowers, create a modern and design forward fall tray that suits a contemporary or minimalist interior. This palette avoids the traditional harvest orange and creates a fall arrangement that could transition into winter with very few swaps.
8. All Natural and Neutral for a Calm Seasonal Tray
An entirely natural and neutral fall tray using cream pumpkins, dried botanicals in ivory and tan, beeswax candles in their natural color, natural wood elements, and organic materials such as moss, acorns, and pine cones in their unaltered colors creates a calm, sophisticated fall arrangement that reads as seasonal through texture and material rather than color. This approach suits a Scandinavian, minimalist, or Japandi interior and transitions naturally into a winter arrangement with the addition of a few sprigs of pine or dried white cotton stems.
Essential Fall Tray Elements
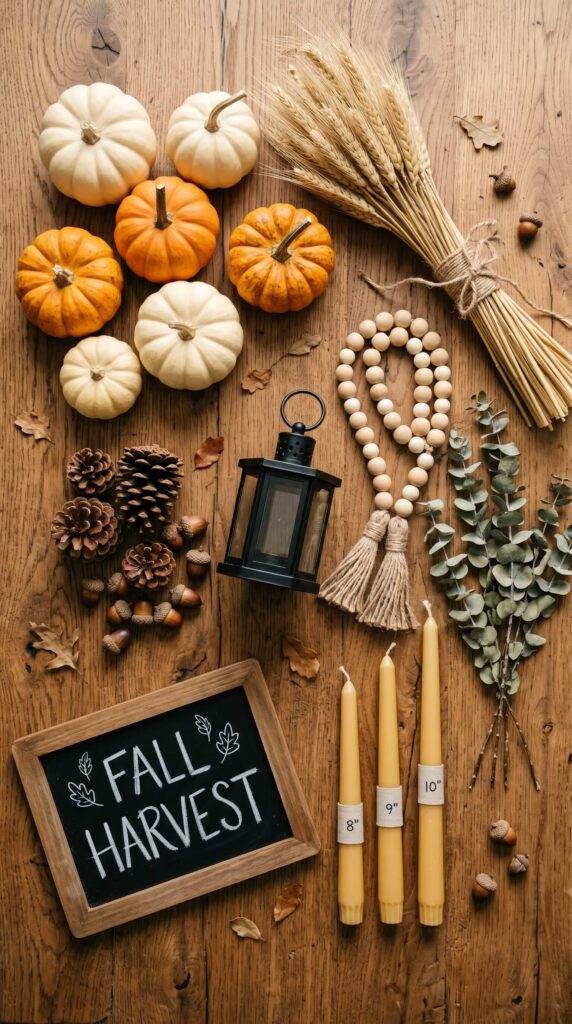
9. Mini Pumpkins and Gourds as the Anchor Elements
Mini pumpkins and small ornamental gourds are the essential anchor elements for any fall tiered tray. Use at least three on the bottom tier and one on the middle tier. Mix real mini pumpkins with faux velvet or ceramic versions for variety in texture. White and cream pumpkins alongside orange ones prevent the arrangement from looking monochromatic. Heirloom gourds with unusual shapes, warty textures, and striped coloring add the organic variety that makes an arrangement look collected rather than purchased from a single display.
10. Candles for Height, Warmth, and Seasonal Scent
Candles provide the vertical height that pumpkins and gourds alone cannot give a tiered tray. A single taper candle in a small candlestick on the top tier adds height that draws the eye upward through the whole arrangement. Pillar candles in the middle tier add a warm glow that reads through the tray when lit in the evening. Autumn scented soy candles in small glass holders add seasonal fragrance. Choose candles in cream, ivory, deep burgundy, or warm orange to stay within the fall palette.
11. Dried Botanicals and Natural Elements as Filler
The gaps between the anchor elements on each tier of the tray are filled by dried botanicals and small natural elements. Dried eucalyptus sprigs, small bundles of dried wheat or lavender, sprigs of dried rosemary, dried orange flower petals, pine cones in small sizes, acorns, and dried seed pods all work as filler elements that connect the larger anchor pieces into one cohesive arrangement. These natural fillers cost almost nothing and are often available in the yard, in a park, or at a craft store in bulk bags.
12. Small Signs, Figurines, and Seasonal Typography
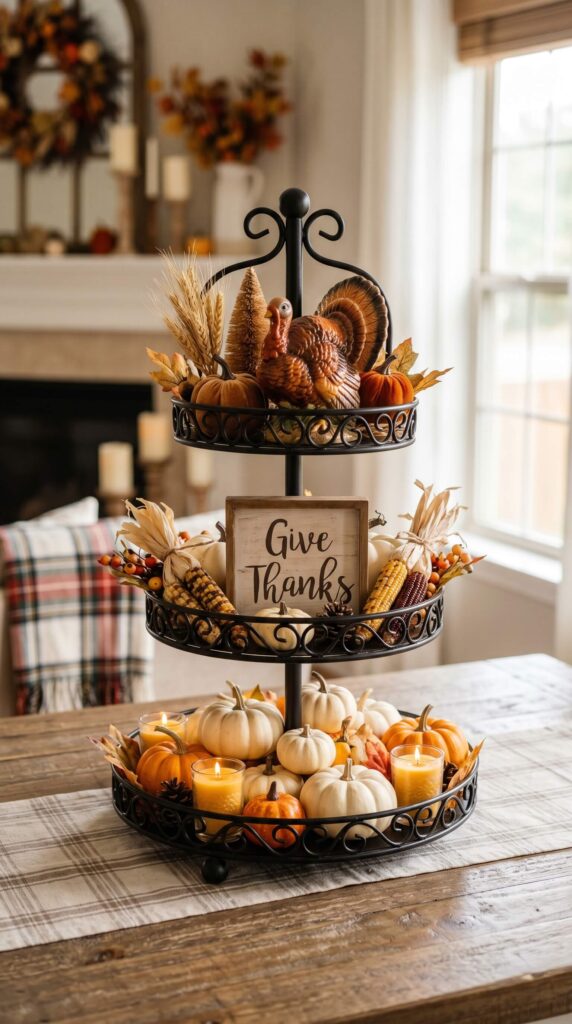
A small wooden sign with a fall message such as Gather, Hello Fall, or Give Thanks, a miniature scarecrow figurine, a small chalkboard with a handwritten seasonal word, or a small framed piece of fall art adds a typographic or illustrative element to the tray that personlizes it and makes it feel specifically composed rather than generically seasonal. Place the sign at the back of the top tier leaning against the tray’s center pole for maximum visibility. Keep the sign small and the text legible from the normal viewing distance of the surface the tray sits on.
Styling Techniques
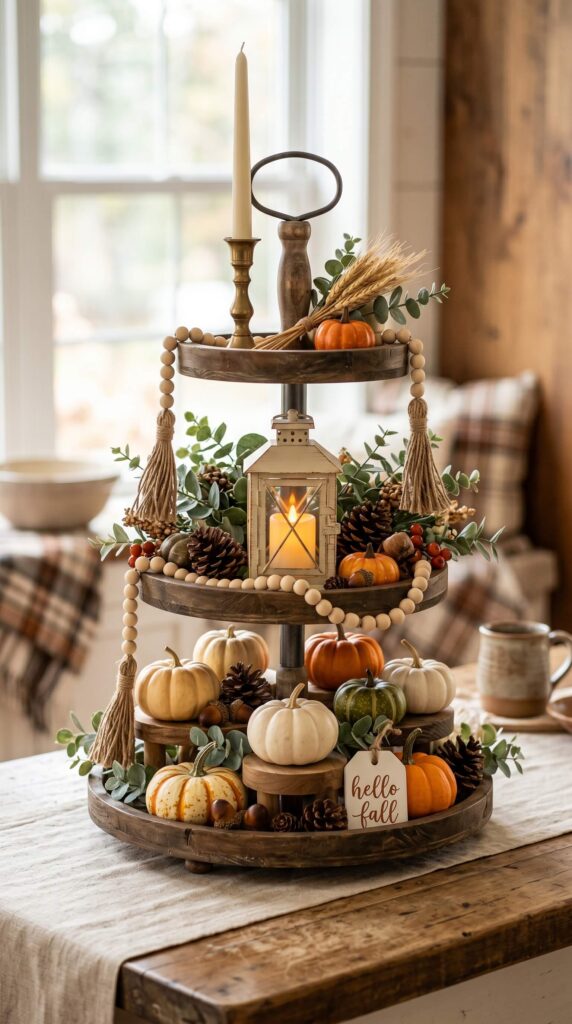
13. Use the Triangle Rule for Visual Balance
The triangle rule for tiered tray styling means that no two elements of the same type should be at the same height within the display. Draw an imaginary triangle from the tallest element at the top, down to two medium height elements in the middle tier, down to three or four low elements on the bottom tier. The eye follows this triangle naturally and the arrangement feels balanced and complete. When every element sits at the same height, the display looks flat. When they form a triangle, it looks designed.
14. Drape a Garland Over Multiple Tiers for Continuity
A strand of wooden bead garland, a fall leaf garland on a thin wire, a length of jute twine studded with dried orange slices, or a beaded pumpkin garland draped loosely over the edges of two or three tiers creates a visual connection between the levels that individual elements placed independently cannot achieve. The garland draping from tier to tier makes the arrangement read as one unified display rather than three separate shelves with things on them. Drape it loosely so it falls naturally rather than in a perfectly even loop.
15. Add One Tall Vertical Element to the Top Tier
The top tier of a tiered tray typically has the least floor space of any tier and benefits most from a single tall vertical element rather than a collection of small horizontal ones. A tall taper candle in a small candlestick, a slim bud vase with a single dried stem, a small wooden sign standing upright, or a miniature pumpkin stack on a thin stand all work well as the top tier vertical anchor. The tall element on the top tier draws the eye up through the whole arrangement and provides the apex of the composition.
16. Leave Some Space Between Elements for Breathing Room
The most common mistake in tiered tray styling is overfilling each tier so that no single element has any space around it. Leave at least one third of each tier surface empty so the elements can be seen individually as well as as a group. The empty spaces between elements are not gaps to be filled. They are part of the composition. An overfilled tray looks cluttered. A tray with breathing room between each element looks styled.
Seasonal Transitions
17. The Fall to Halloween Transition
A base fall tiered tray transitions to a Halloween specific display with the addition of just two or three Halloween elements rather than a complete swap. Add a small black cat figurine or a miniature skull to the bottom tier. Swap one cream pumpkin for a painted black pumpkin. Add a spider web decoration draped over one tier. Change one candle to a deep black or very dark burgundy. The base elements including the natural pumpkins, dried botanicals, and warm candles remain unchanged and the Halloween additions give the whole arrangement a spooky overlay.
18. The Halloween to Thanksgiving Transition
After October 31st, remove the Halloween specific additions including the skull, black pumpkins, and spider web. Replace them with Thanksgiving elements: a small Give Thanks sign in place of the Halloween figurine, a few small ears of dried decorative corn added to the bottom tier, and one or two autumn leaf clusters in rich burgundy and gold tones. Swap the dark candle for a warm cream or cinnamon colored one. The base fall arrangement underneath the Halloween additions was always Thanksgiving appropriate so the transition takes less than ten minutes.
19. The Transitional Tray That Works From September Through November
A tiered tray designed to work all the way from early September through late November without any seasonal swap uses elements that span the full autumn season. Natural pumpkins and gourds in cream and white tones rather than bright orange, dried botanicals in neutral warm tones, beeswax candles, and a simple wooden sign with a generic seasonal message such as Autumn or Gather read as fall without being specifically associated with any single holiday within the season. Swap the candles and replenish the fresh pumpkins as needed but leave the arrangement structure intact.
20. The Year Round Tray With Seasonal Swaps
The most practical tiered tray arrangement for a permanently displayed tray is one with a year round base structure of neutral elements that updates seasonally with a small swap kit. The tray itself, the candlesticks, the wooden bead garland, and the lantern remain on the tray all year. A small box or bag beside the tray holds the seasonal swap elements: mini pumpkins and pine cones for autumn, small ornaments and pine sprigs for winter, small eggs and spring flowers for spring, and seashells and citrus slices for summer. Each season requires adding and removing only three or four elements to the permanent base.
Key Takeaways
- Start styling from the bottom tier up so the largest and most visible tier sets the scale for the whole display
- Use the triangle rule to create height variation: tallest element at the top, progressively lower elements descending
- Drape a garland over two or three tiers to create visual continuity between the levels
- Leave one third of each tier surface empty so individual elements can breathe and be seen clearly
- Mini pumpkins, candles, and dried botanicals are the three essential categories for any fall tray
- Transition from fall to Halloween by adding three Halloween elements to the base arrangement rather than swapping everything
- Transition from Halloween to Thanksgiving by removing the Halloween additions and adding three Thanksgiving elements
- A year round tray with a permanent base and a small seasonal swap kit is the most practical and least expensive approach
Frequently Asked Questions
What is the best size tiered tray for fall decorating?
A three tier tray with tiers ranging from 10 to 14 inches in diameter provides the most display surface for fall elements while fitting on most kitchen counters, console tables, and sideboards. A tray that is too small, under 8 inches per tier, does not provide enough surface for a layered arrangement that reads from normal viewing distance. The total height of the tray including all three tiers should be appropriate for the surface it sits on and the ceiling height above it.
How many items should go on each tier of a fall tiered tray?
A well balanced three tier fall tray typically has four to six items on the bottom tier, two to three on the middle tier, and one to two on the top tier. Fewer items on each successive tier up the display creates a natural visual pyramid. The items on the lower tiers should include the largest and most grounding elements. The top tier item should be the tallest or most vertical element in the entire arrangement.
Where should a tiered tray be placed for maximum impact?
The kitchen island or kitchen counter is the most common and most effective placement for a fall tiered tray because the tray is visible from three sides and is at a natural eye level from a standing position. A console in the entryway works equally well for the same reasons. Coffee tables work if the tray is not so tall that it blocks sightlines across the room during conversation. Avoid placing the tray directly against a wall where the back of each tier is invisible.